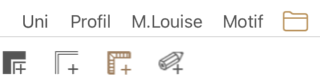
Appuyer sur le bouton "Dossier" de la barre d'outil appropriée.
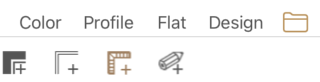
Touch the "Folder" in the appropriate toolbar.
Touch the "Folder" in the appropriate toolbar.
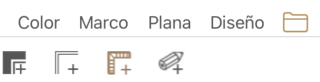
Haga clic en el botón "carpeta" en la barra de elementos.
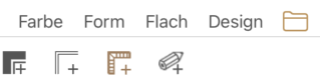
Drücken Sie die Schaltfläche "Verzeichnis" in der entsprechenden Symbolleiste.
Etape 2
Step 2
Step 2
Etapa 2
Schritt 2
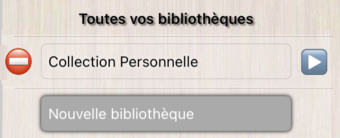
Créer une bibliothèque.
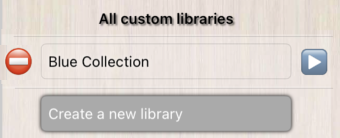
Create a library.
Create a library.
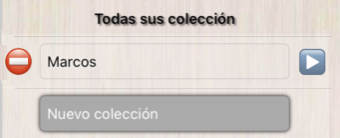
Crear una colección
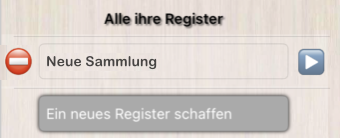
Eine Sammlung erstellen
Etape 3
Step 3
Step 3
Etapa 3
Schritt 3
Entrer dans la bibliothèque en touchant le bouton de droite et créer un élément personnalisé.
Pour prendre vos photos, privilégier la caméra arrière, qui possède une meilleure résolution.
Enter in library touching the button on the right.
To take your photo, use the background camera for a better resolution.
Enter in library touching the button on the right.
To take your photo, use the background camera for a better resolution.
Entre en la colección tocando el botón de derecha y crear un elemento personalizado.
Betreten Sie die Sammlung, indem Sie die rechte Schaltfläche berühren, und erstellen Sie ein benutzerdefiniertes Element.
Bevorzugen Sie zum Aufnehmen Ihrer Fotos die Rückkamera, die eine bessere Auflösung hat.
Etape 4
Step 4
Step 4
Etapa 4
Schritt 4
Appuyez sur le bouton et choisissez la source.
Photographier la moulure ou le motif.
Utiliser une image représentant la moulure ou le motif dans vos photos.
Touch the button and choose the source.
Take a photo of the molding or pattern.
Choose a picture of the molding or the pattern in your album.
Touch the button and choose the source.
Take a photo of the molding or pattern.
Choose a picture of the molding or the pattern in your album.
Apoyar el botón para elegir la fuente.
Fotografiar el elemento.
Escoger una foto.
Drücken Sie die Taste und wählen Sie die Herkunft.
Fotografieren Sie das Muster.
Verwenden Sie ein Bild, das die Leiste oder das Muster in Ihren Fotos darstellt.
Etape 5
Step 5
Step 5
Etapa 5
Schritt 5
Créer l'élément.
Create the item
Create the item
Crear el elemento
Ein element erstellen
Si vous avez opté pour la caméra, prendre la photo bien droite, bien en face, et plutôt dans le sens de la longueur de l'écran pour avoir une meilleure qualité. Votre moulure doit être bien éclairée, et vous obtiendrez de meilleurs résultats si la lumière arrive par la gauche.
Procédez ensuite par étapes successives. Il vous faudra un peu d'entraînement pour bien maîtriser l'outil.
If you have chose the camera, take the photo very straight ahead, and in preference to length orientation of the camera to obtain a best resolution.
Your molding has to be well lit, and it would be better with the light coming from the left.
Then, realize the below steps. You will need a light practice before have a good command of the tool.
Si optaste por la cámara, haz la foto de frente, y más bien en el sentido del largo de la pantalla para tener una mejor resolución. Tu artículo debe estar bien iluminado y obtendrás mejores resultados si la luz entra por la izquierda.
Luego proceder en etapas sucesivas. Necesitará práctica para dominar la herramienta.
Wenn Sie sich für die Kamera entschieden haben, nehmen Sie das Foto gerade, vorne und eher in Längsrichtung des Bildschirms auf, um eine bessere Qualität zu haben. Ihre Leiste sollte gut beleuchtet sein, und Sie erhalten bessere Ergebnisse, wenn das Licht von links kommt.
Dann stufenweise aufeinanderfolgend vorgehen. Sie benötigen etwas Übung, um das Werkzeug zu beherrschen.
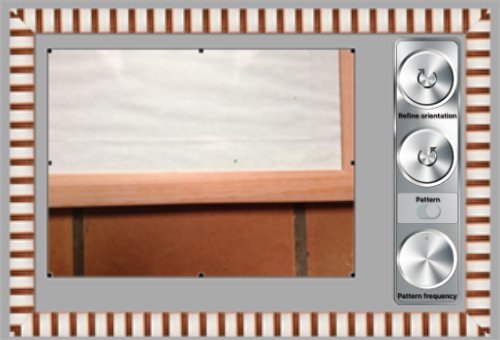
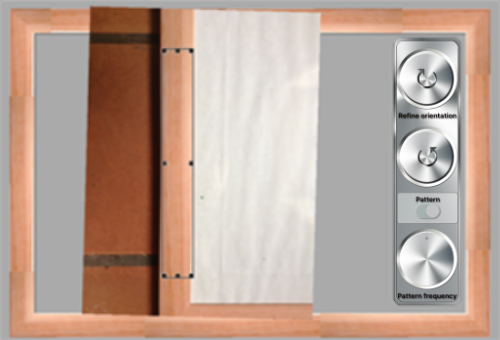
Pour masquer le texte d'aide, appuyez-dessus.
Travaillez avec les poignées pour définir au mieux les bords de la moulure.
Utilisez la rotation à deux doigts pour placer votre moulure verticalement, côté extérieur à gauche. Prévisualisez dans le même temps vos opérations dans le cadre qui entoure l'écran.
To hide the help text, touch it.
Use the crop tool to define precisely the molding border and use the rotation with two fingers to obtain the perfect angle, with external side on the left.
Look simultaneously the result on the frame which is laid arround the screen.
To hide the help text, touch it.
Use the crop tool to define precisely the molding border and use the rotation with two fingers to obtain the perfect angle, with external side on the left.
Look simultaneously the result on the frame which is laid arround the screen.
Para ocultar el texto de ayuda, púlselo.
Trabaje con las asas para definir mejor los bordes del patrón.
Use la rotación con dos dedos para colocar el elemento verticalmente, con el lado exterior hacia la izquierda. Obtenga una vista previa de sus operaciones al mismo tiempo en el marco que rodea la pantalla.
Um den Hilfetext auszublenden, tippen Sie darauf.
Arbeiten Sie mit den Griffen, um die Kanten des Formteils am besten zu definieren.
Mit Zwei-Finger-Drehung positionieren Sie Ihre Leiste vertikal, Außenseite nach links. Sehen Sie sich Ihre Vorgänge gleichzeitig in dem Rahmen an, der den Bildschirm umgibt.
Créer depuis un motif.
Create from a pattern.
Create from a pattern
Crear a partir de un patrón.
Pour tous les types d'éléments, si le switch est actif.
All items type, if switch is on.
All items type, if switch is on.
Para todos los tipos de elementos, si el interruptor está activo.
Aus Muster erstellen.
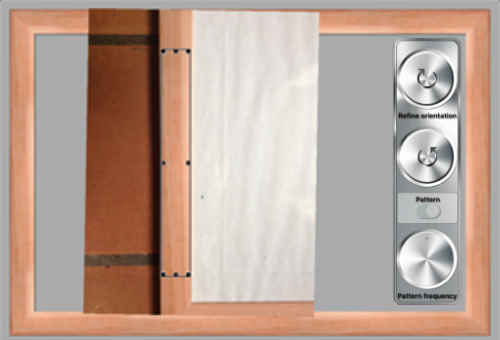
Appuyez sur les boutons de rotation pour affiner l'orientation de l'image. Soyez attentif au résultat et le plus précis possible.
To be more precise, use the rotation buttons. Be carefull to obtain the best result you can.
To be more precise, use the rotation buttons. Be carefull to obtain the best result you can.
Pulse los botones de rotación para ajustar con precisión la orientación de la imagen. Estar atento al resultado y ser lo más preciso posible.
Drücken Sie die Rotationstasten, um die Ausrichtung des Bildes fein abzustimmen. Achten Sie auf das Ergebnis und so präzise wie möglich.
Enfin, il vous reste à régler la fréquence du motif. Cela va permettre de masquer le raccord.
Pour cela utiliser le bouton prévu à cette occasion. Faites glisser votre doigt sur le bouton pour un changement rapide, toucher simplement le bouton pour un réglage plus fin.
Si vous avez une moulure avec des motifs très particuliers, le réglage de la fréquence devra être particulièrement précis. Dans notre exemple, c'est très simple.
Lorsque le résultat vous convient parfaitement, vous pouvez valider.
At last, you have only to adjust the pattern frequency. This step is very important, to. It will hide the join.
To do that, use the "pattern frequency" button. Slide your finger on it or touch it simply to refine pattern frequency.
In your sample, it's very simple, but sometimes, if your molding is particularly complex, you have to take care with that step.
When the result is as perfect as possible, you can valid it.
Finalmente, tienes que ajustar la frecuencia del patrón. Esto ocultará la conexión.
Para ello, utilice el botón previsto a tal efecto. Deslice su dedo sobre la perilla para un cambio rápido, solo toque la perilla para un ajuste más fino.
Si tiene un patron muy particulares, el ajuste de frecuencia tendrá que ser particularmente preciso. En nuestro ejemplo, es muy simple.
Cuando el resultado te convenga perfectamente, puedes validar.
Schließlich müssen Sie die Frequenz des Musters anpassen. Dadurch wird die Verbindung ausgeblendet.
Verwenden Sie dazu die dafür vorgesehene Schaltfläche. Schieben Sie Ihren Finger über den Knopf für eine schnelle Änderung, berühren Sie einfach den Knopf für eine feinere Einstellung.
Wenn Sie eine Leiste mit ganz besonderen Mustern haben, muss die Frequenzeinstellung besonders präzise sein. In unserem Beispiel ist es ganz einfach.
Wenn das Ergebnis zu Ihnen passt, können Sie es validieren.
Créer depuis une couleur de l'image.
Create from color in picture.
Create from color in picture
Crear a partir del color de la imagen.
Aus Bildfarbe erstellen.
Uniquement pour les éléments de type passepartout et les cartons.
Only for mats and boards.
Only for mats and boards.
Solo para elementos tipo passepartout y cartulinas.
Nur für die Passepartout und Kartons.
Vérifiez que le switch est sur "off".
Positionner la loupe sur l'endroit de l'image choisi.
Check that the switch is "off".
Set the zoom tool on the chosen color.
Check that the switch is "off".
Set the zoom tool on the chosen color.
Compruebe que el interruptor está "apagado".
Coloque la lupa en la parte elegida de la imagen.
Überprüfen Sie, ob der Schalter auf „Aus“ steht.
Positionieren Sie die Lupe auf dem ausgewählten Teil des Bildes.
Créer depuis une couleur quelconque.
Create from a color picker.
Create from a color picker.
Crear a partir de cualquier color.
Aus jeder Farbe erstellen.
Uniquement pour les éléments de type passepartout et les cartons.
Only for mats and boards.
Only for mats and boards.
Solo para elementos tipo passepartout y cartulinas
Nur für die Passepartout und Kartons.
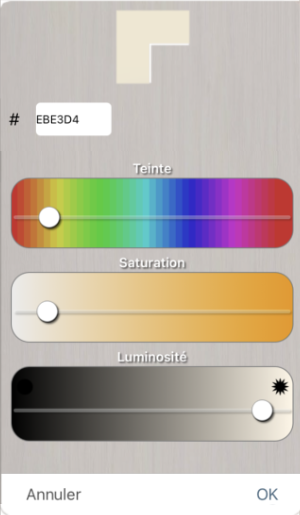
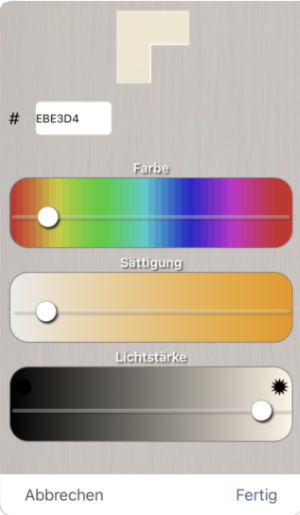
Utiliser le sous-menu adapté et choissez la couleur.
Use the color picker submenu and choose the color.
Use the color picker submenu and choose the color.
Use el submenú apropiado y elija el color.
Verwenden Sie das entsprechende Untermenü und wählen Sie die Farbe aus.
Etape 6
Step 6
Step 6
Etapa 6
Schritt 6
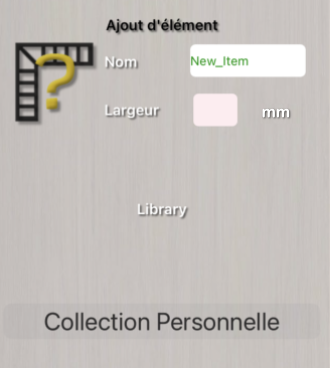
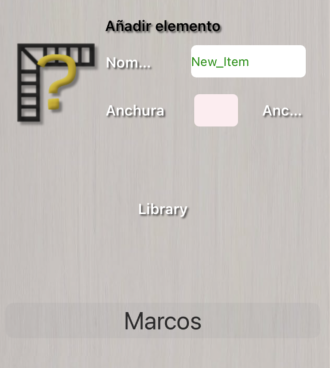
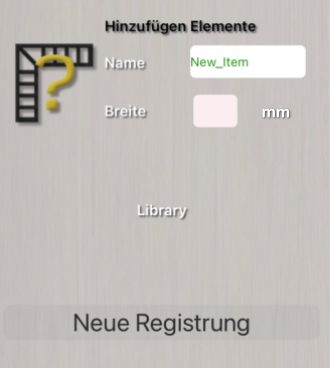
Définir les propriétés de votre élément personnalisé.
Nom
Bibliothèque
Dimensions (largeur pour les moulures, épaisseur pour les passepartout)
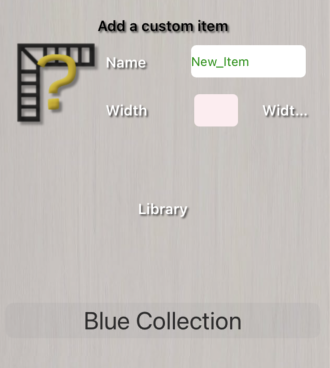
Define the properties of your custom item.
Name
Library
Size (width for moldings, thickness for mats or boards)
Define the properties of your custom item.
Name
Library
Size (width for moldings, thickness for mats or boards)
Establezca propiedades para su elemento personalizado.
Nombre
Colección
Tamaño (ancho para las molduras, grosor para los passepartout y cartulinas)
Legen Sie Eigenschaften für Ihr benutzerdefiniertes Element fest.
Name
Sammlung
Abmessungen (Leistenbreite, Kartondicke)
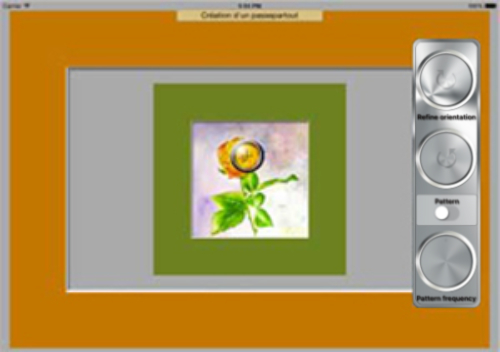
Votre élément personnalisé a été généré, vous pourrez l'utiliser en y accédant par la bibliothèque dans laquelle vous l'avez ajouté.
Exemple d'utilisation du cadre personnalisé.
You custom item has been created, you can use it. It is available in the operational library.
That is a sample using the custom molding.
You custom item has been created, you can use it. It is available in the operational library.
That is a sample using the custom molding.
Su elemento personalizado ha sido generado, puede usarlo accediendo a él a través de la colección a la que lo agregó.
Ejemplo de uso de la moldura personalizada.
Ihr personalisiertes Element wurde generiert, Sie können es verwenden, indem Sie über die Sammling darauf zugreifen, in der Sie es hinzugefügt haben.
Beispiel für die Verwendung des benutzerdefinierten Rahmen.
Vous pourrez ensuite les supprimer, ou les modifier en appuyant longuement sur la vignette correspondante dans leur bibliothèque.
Vous pourrez alors modifier leurs propriétés, ou les déplacer dans une autre bibliothèque s'il y a lieu.
Then you can delete or modify it.
To access this feature, long press its thumbnail in the custom library.
Then you can delete or modify it.
To access this feature, long press its thumbnail in the custom library.
Luego puede eliminarlos o modificarlos manteniendo presionada la miniatura correspondiente en su colección.
Luego puede modificar sus propiedades o moverlas a otra colección si es necesario.
Sie können sie dann löschen oder ändern, indem Sie lange auf die entsprechende Miniaturansicht in ihrer Sammlung drücken.
Sie können ihre Eigenschaften ändern oder sie bei Bedarf in eine andere Sammlung verschieben.
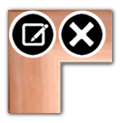
A gauche, bouton d'édition, pour modifier l'image, les propriétés, la bibliothèque.
A droite, bouton de suppression, pour supprimer l'élément. Attention, cette opération est irréversible.
Vous ne pourrez toutefois pas supprimer un élément qui est utiliser dans le cadre courant ou dans un modèle de cadre.
Si vous souhaitez toutefois le supprimer, il faudra d'abord supprimer l'élément dans le cadre courant, ou le cas échéant, supprimer le ou les modèles qui l'utilisent.
On the left, an "edit" button, to modify the picture, the properties or change the containing library.
On the right, a "delete" button, to delete the custom item. Be carefull, this action is irreversible.
However, you won't be abble to remove a custom item which is used in the current frame or in your custom templates. You have first to delete it from the current, or to delete the concerned templates.
A la izquierda, botón editar, para modificar la imagen, las propiedades, la colección.
A la derecha, botón eliminar, para eliminar el elemento. Tenga en cuenta que esta operación es irreversible.
Sin embargo, no podrá eliminar un elemento que se utilice en el marco actual o en una plantilla de marco.
Si desea eliminarlo, primero debe eliminar el elemento en el cuadro actual o, si es necesario, eliminar los modelos que lo utilizan.
Auf der linken Seite die "Schaltfläche bearbeiten", um das Bild, die Eigenschaften oder die Sammlung zu ändern.
Auf der rechten Seite "Schaltfläche löschen", um das Element zu löschen. Bitte beachten Sie, dass dieser Vorgang irreversibel ist.
Sie können jedoch kein Element löschen, das im aktuellen Rahmen oder in einer Rahmenvorlage verwendet wird.
Wenn Sie es jedoch löschen möchten, müssen Sie zuerst das Element im aktuellen Rahmen löschen oder, falls erforderlich, die Modelle löschen, die es verwenden.
Nous pensons que vous allez prendre beaucoup de plaisir à utiliser ce nouveau concept, car il est le seul à vous offrir toute latitude dans la personalisation de vos encadrements.
Vous pouvez réaliser des cadres avec des moulures classiques d'encadrement, mais également vous amuser avec des photos à thèmes.
We hope you will really enjoy this tool, because, it is the only tool which offer this possiblities for your frames.
You can realize classic framings, but you can, to, have entertainment in using it with various themes.
We hope you will really enjoy this tool, because, it is the only tool which offer this possiblities for your frames.
You can realize classic framings, but you can, to, have entertainment in using it with various themes.
Creemos que realmente apreciará este nuevo concepto, porque es el único que le brinda total libertad para personalizar sus marcos.
Puedes crear marcos clásicos, pero también divertirte con fotos temáticas.
Wir glauben, dass Sie viel Freude an diesem neuen Konzept haben werden, denn es ist das einzige, das Ihnen volle Freiheit bei der Personalisierung Ihrer Rahmen bietet.
Sie können Rahmen mit klassischen Rahmenleisten herstellen, aber auch Spaß an Themenfotos haben.
Utiliser un élément personnalisé
Use a custom item
Use a custom item
Usar un elemento personalizado
Benutzen benutzerdefinierten Element erstellen
Etape 1
Step 1
Step 1
Etapa 1
Schritt 1
Appuyer sur le bouton "Dossier" de la barre d'outil appropriée.
Touch the "Folder" in the appropriate toolbar.
Touch the "Folder" in the appropriate toolbar.
Haga clic en el botón "carpeta" en la barra de elementos.
Drücken Sie die Schaltfläche "Verzeichnis" in der entsprechenden Symbolleiste.
Etape 2
Step 2
Step 2
Etapa 2
Schritt 2
Choisissez la bibliothèque.
Choose the library.
Choose the library.
Elegir la colección
Die Sammlung wählen
Etape 3
Step 3
Step 3
Etapa 3
Schritt 3
Entrer dans la bibliothèque en touchant le bouton de droite et choisissez un élément personnalisé.
Enter in library touching the button on the right, and chose the item.
Enter in library touching the button on the right, and chose the item.
Entre en la colección tocando el botón de derecha y elige un elemento personalizado.
Betreten Sie die Sammlung, indem Sie die rechte Schaltfläche berühren, und erstellen Sie ein benutzerdefiniertes Element.